Tutorials • DNS
Editing a DNS zone using the WHM Edit DNS Zone function
In this article, we will present the necessary steps for editing a DNS zone using the WHM Edit DNS Zone function.
2
Views 2099Updated 2 aniPublished on 25/09/2018by Sebastian S.
Introduction
- The DNS (Domain Name Service) converts human-readable domain names (e.g.: example.com) into computer-readable IP addresses (e.g.: 192.0.32.10). DNS relies on "DNS zones" that exist on the server to convert domain names to IP addresses.
- WHM offers the ability to modify a DNS zone that is managed by the DNS service installed on the server. This functionality is provided by DNS Functions, specifically Edit a DNS Zone.
Requirements
- WHM login details. These can be found in the email with the management details of the reseller account or the VPS with cPanel/WHM.
Steps
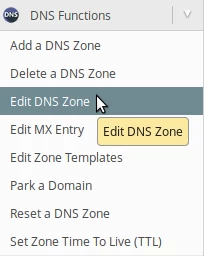
- After logging into WHM on the left side of the page, we will navigate to the DNS Functions section and click on Edit a DNS Zone. Alternatively, we can search for this menu using the search field on the top left.
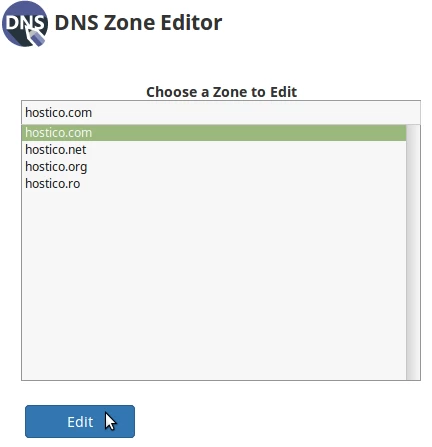
- On the next page, we will select the domain we wish to modify, then click on the Edit button.
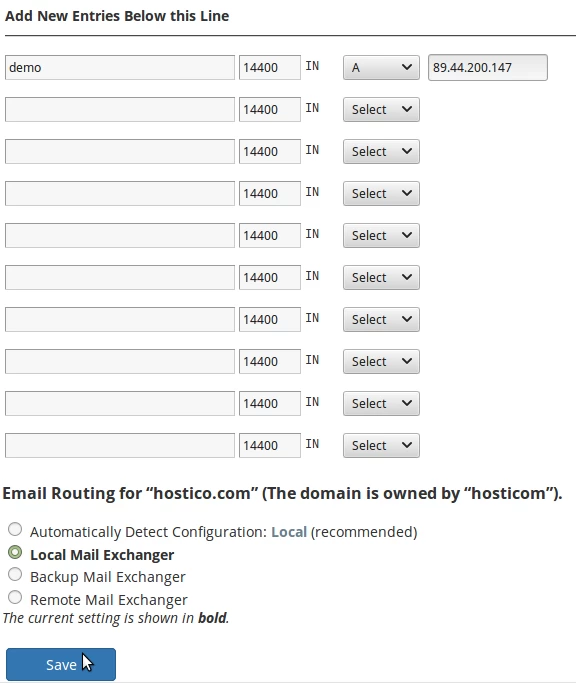
- All DNS records of the selected domain will be loaded into a tabular interface containing the columns:
Domain
TTL - time to live.
Type of DNS record. - Here we will have the possibility to edit existing records or add new ones in the empty fields at the bottom of the table.
- The most common DNS records are:
A - associates a domain name with an IPv4 address.
AAAA - associates a domain name with an IPv6 address.
MX - Identifies the email server to which emails are directed.
CNAME - associates a domain with an alias. - At the end of the table, we will be able to modify even the email routing. We can choose between:
Local Mail Exchanger (the email server used is local) - the email server used will be the local one
- the email server used will be the external one, but in case the external server is unavailable, the local one will be used.
- the email server used will be an external one, according to the MX records. - After making the desired changes, we will click the Save button at the bottom of the page. As an example, we have added an A record that associates the subdomain demo.hostico.com with the IP 89.44.200.147 and have set the email routing to the local option.
- If everything has gone smoothly, we will be greeted by a success message Your settings have been updated.